| Highways, Byways, And Bridge Photography |
Reedy Point Bridge
DE-9 Chesapeake & Delaware Canal Crossing
Delaware City, DE
|
• Structure ID: |
NBI: 1496002. |
|
• Location: |
1.0 Miles West Of Reedy Point. |
|
• Canal Elevation: |
0 Feet (Sea Level). |
|
• Highway: |
DE-9. |
|
• Daily Traffic Count: |
1,742 (2002). |
|
• Bridge Type: |
Continuous Steel Thru Truss, Steel Girder Approaches. |
|
• Length: |
8,432 Feet, 600 Foot Longest Span. |
|
• Width: |
2 Traffic Lanes, 26 Feet. |
|
• Navigation Channel Width: |
400 Feet. |
|
• Height Above Water: |
136 Feet. |
|
• Date Built: |
1968, Reconstructed 1985. |
The C&D Canal runs east and west under the present day DE-9 Reedy Point
Bridge. However, the canal originally ran northeast and southwest passing
through Delaware City. At that time, the highway ran along the south bank
of the canal and crossed a bridge at Delaware City. The canal was
rerouted in the mid-1920s. The new path of the canal cut this highway in
two, blocking the can crossing. The highway was rerouted north and south
across the tidal flats along the Delaware River, and a lift bridge was
built across the canal. This lift bridge operated until the canal was
widened in 1954. At that time, the lift bridge was removed, again,
severing the highway crossing. The highway remained closed until the
new Reedy Point Bridge was opened in 1968. The bridge was built by and
is owned by the US Army Corps of Engineers.
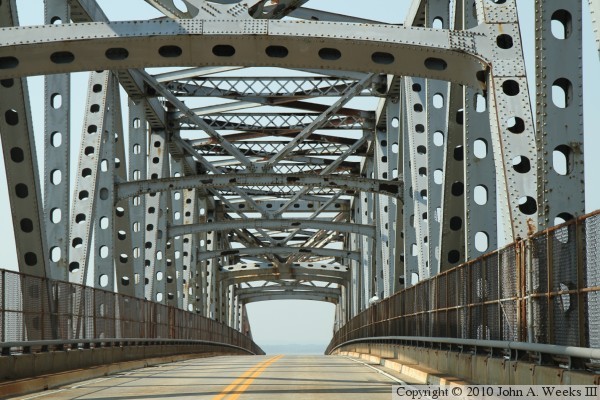
The new bridge is a large steel truss structure. Since the truss crosses
more than two piers, it is known as a continuous truss. The two spans on
each end of the bridge are below the traffic deck. They act as weight
to balance the outer one-fourth of the structure on each side of the main
canal span. These portions of the main canal span in turn hold up the
middle half of the canal span, which is a flat section of truss. Since
the first two spans serve to hold up the center of the bridge, this is
known as a cantilever style of truss.
Given that highway DE-9 runs just a few feet above sea level, yet the
bridge has to allow ocean going ships to pass under the main span, the
bridge has a lot of approach spans. The National Bridge Inventory lists
64 approach spans. They are made of a pair of steel girders that have
truss-like cross-bracing between the girders under the highway deck.
The Reedy Point Bridge is located about a mile from the east end of the
C&D Canal. There is a very good view of the canal entrance from the
northbound lane of DE-9 as you cross the bridge. The canal entrance is
also visible from the access road that runs along the south side of canal.
This access road can be reached by turning off of DE-9 at the far south end
of the bridge. It follows the older route of DE-9 to the site of the
former lift bridge. The old route of DE-9 to the north end of the former
lift bridge also still exists. The route is the access road for the
Fort DuPont State Park. The last 800 feet of the access road is blocked off,
but it is open to pedestrian traffic to walk to the north shore of the
canal channel.
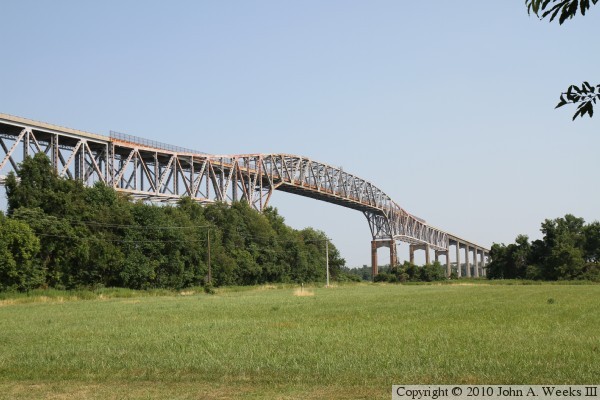
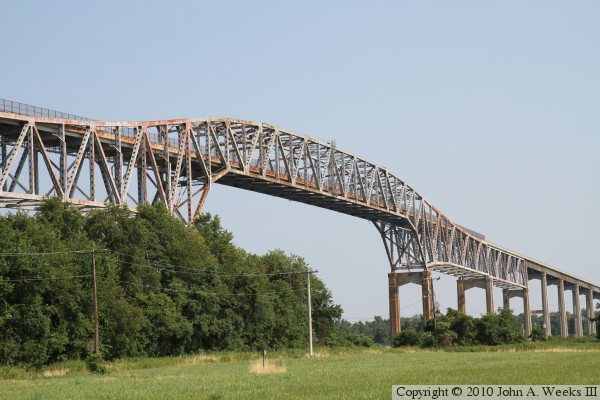
The photos above and below are views of the Reedy Point Bridge as seen looking
southeast from Fort DuPont State Park on the north shore of the C&D Canal.
The photo above is a wider view that includes some of the approach spans, while
the photo below is a closer view of the main canal channel span.
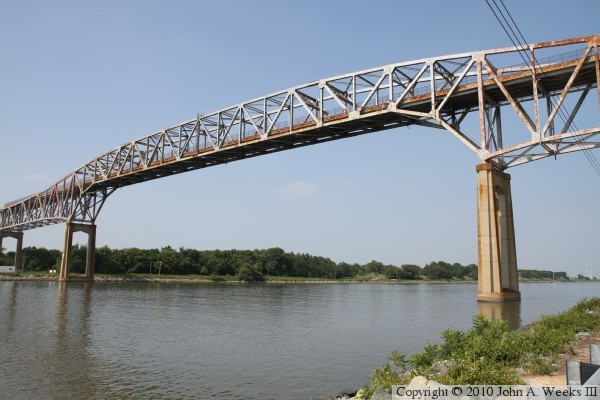
These two photos, and the six that follow, are views of the Reedy Point Bridge
from the tow path on the south side of the canal looking to the northeast.
The photo above is looking north across the canal along the west face of the
bridge. The photo below is a view of the bridge piers on the north side
of the canal that support the truss structure.
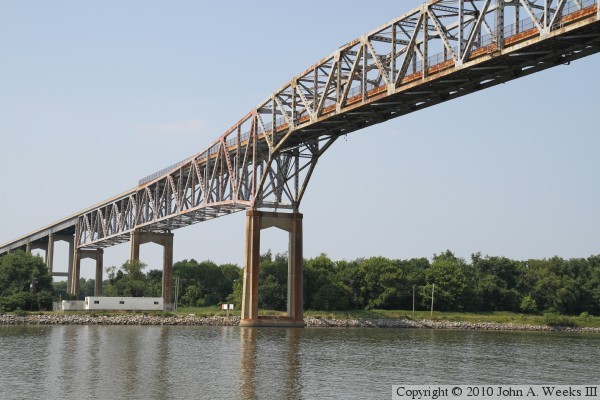
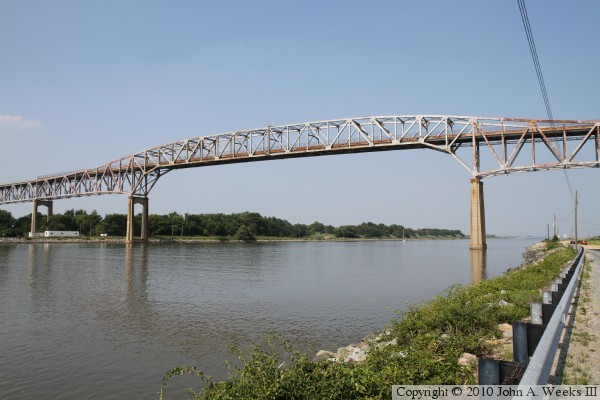
These two photos are views of the east face of the bridge truss structure
over the canal channel. The photo above is the closest vantage point where
I could fit the entire canal span into one frame, while the photo below is
a view from a bit further west. The east canal entrance is about a mile
east of the bridge.
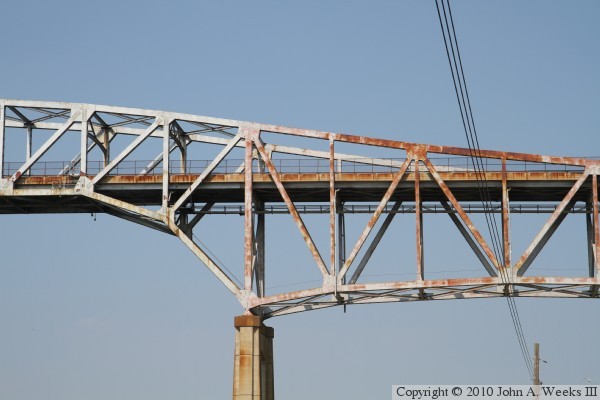
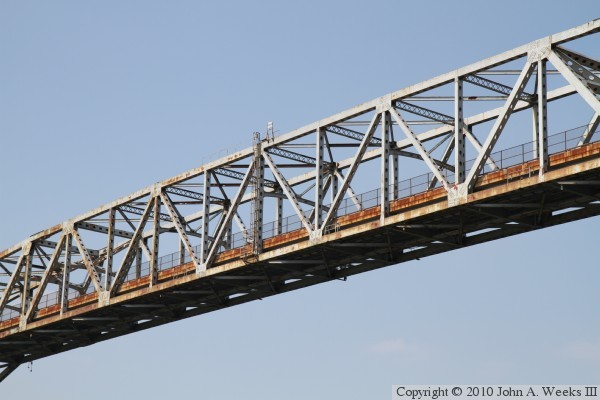
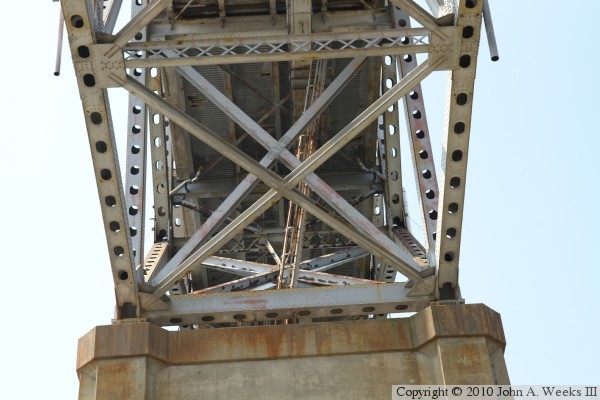
These two photos are close views of the bridge structure. The photo above
is the truss structure above the south main bridge pier. The photo below is
a section of the truss above the canal channel. Note that the truss in the
channel span is exactly level and flat, which is a bit unusual for a long
truss span.
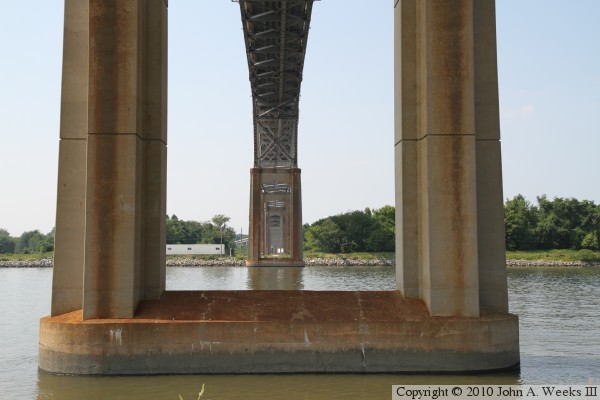
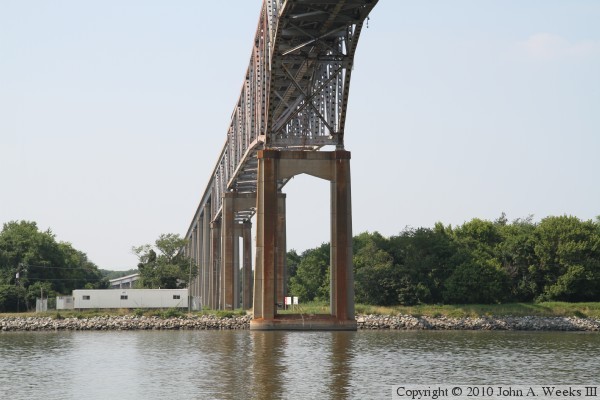
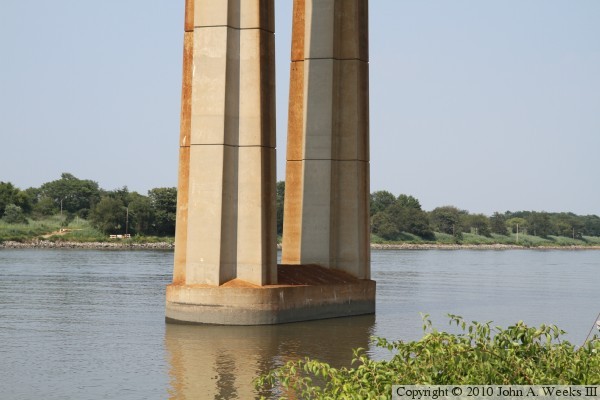
These two photos are views of the main bridge piers. The photo above is
looking directly north across the C&D Canal, while the photo below
is a close view of the south main bridge pier. Note that the bridge pier
is set in the water, which is unusual for the bridges on the canal.
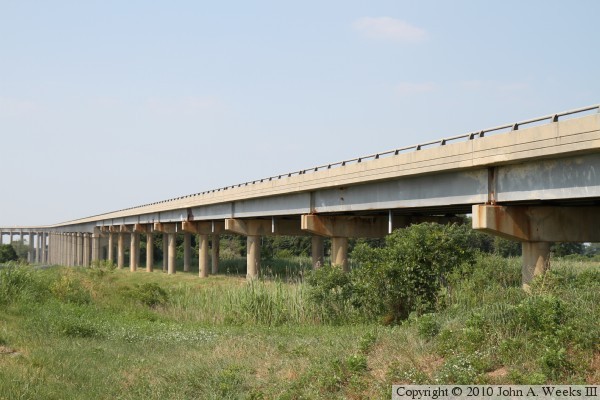
These two photos are views of the lower level approach spans at the south
end of the Reedy Point Bridge. Note that the height of the steel girders
increases in size after the tenth span in the photo above. As a result,
the photo above shows many of the spans with the thinner girders, while the
photo below shows spans with the thicker girders.
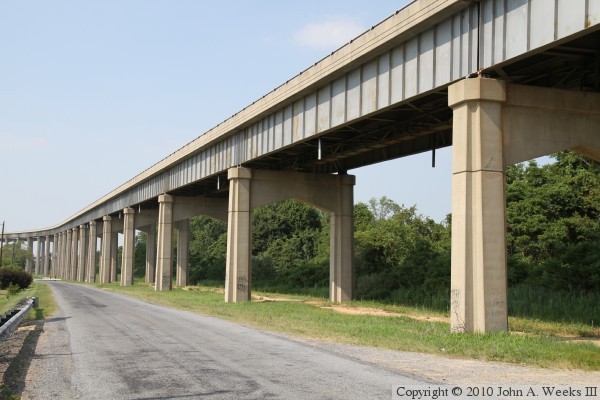
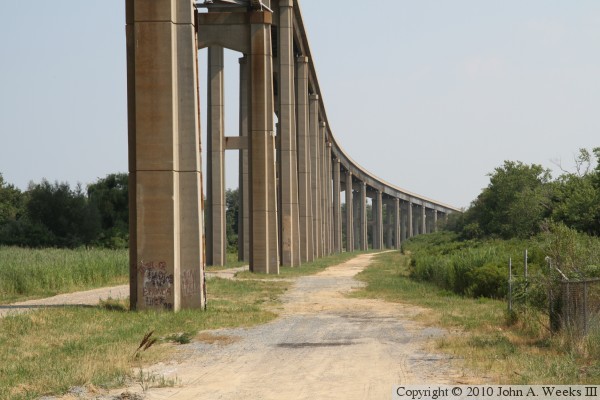
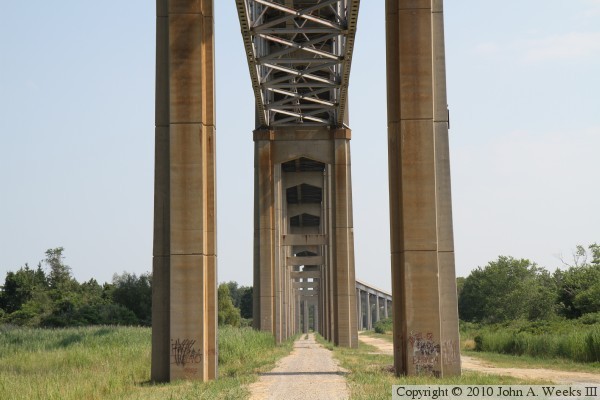
These two photos are views of the taller approach spans leading to the main
truss structure. The photo above is a view looking south along the west
face of the approach spans, while the photo below is looking south directly
under the bridge deck.
The photo above is a view looking up towards the truss structure above the
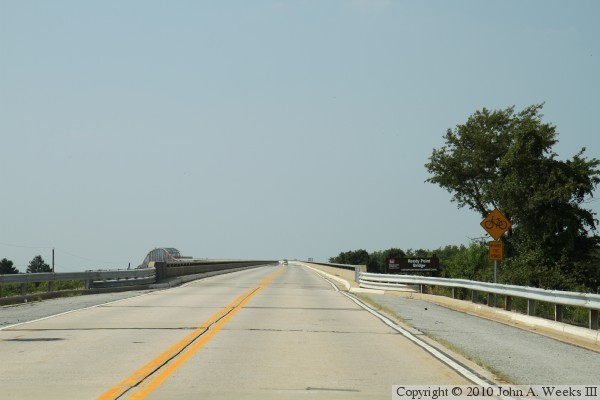
south main bridge pier. The photo below is the first of a seven photo set
showing a typical bridge crossing heading northbound. In this photo, we are
approaching the south end of the bridge. Note the US Army Corps of Engineers
sign with the bridge name.
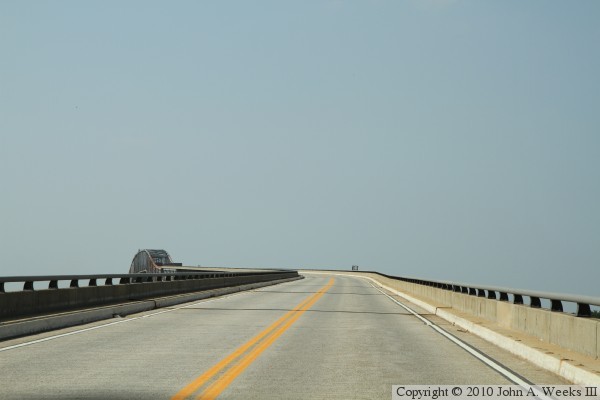
These two photos continue our northbound bridge crossing. In the photo above,
we are heading up the lower level approach spans towards the curve on the
south end of the bridge. We have pass the curve in the photo below, and we
are heading up the taller approach spans.
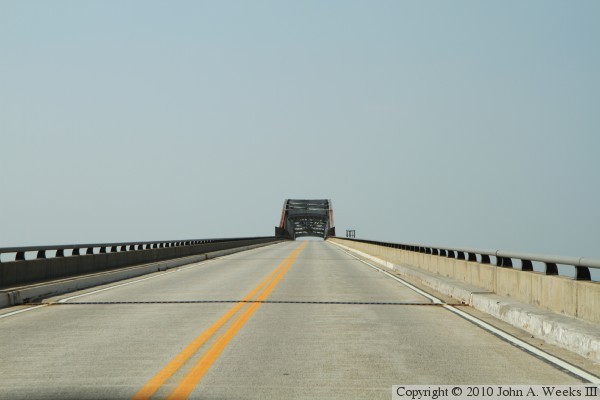
These two photos continue our northbound bridge crossing. We are just
entering the main truss span in the photo above, while we are about one-third
of the way across the main channel span in the photo below.
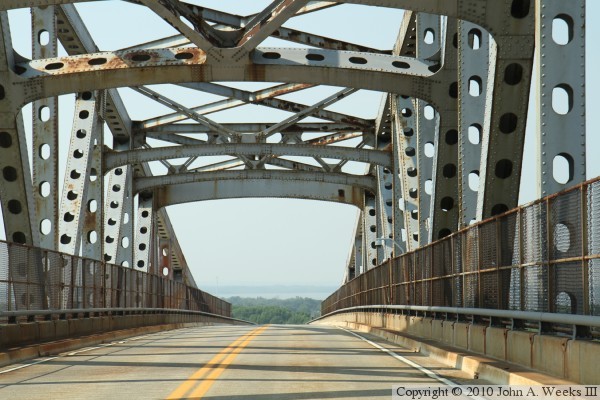
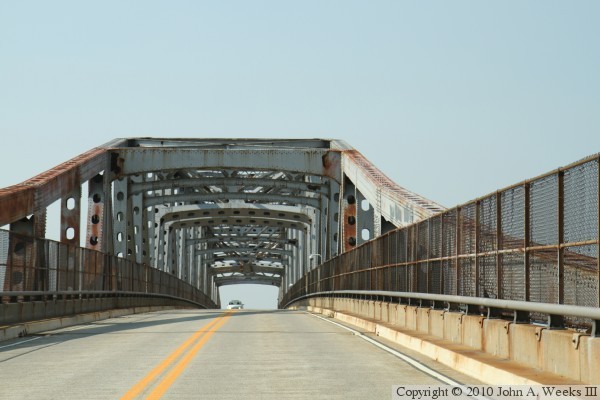
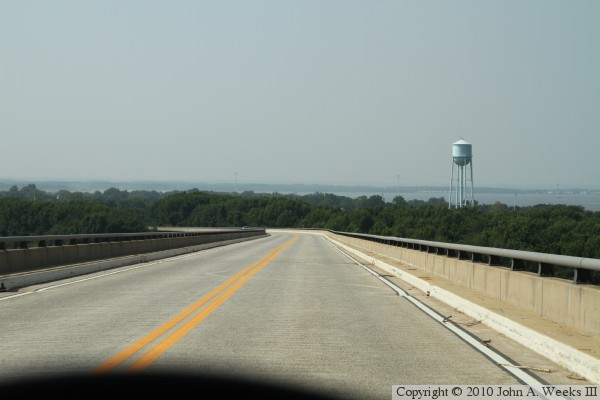
These two photos are the last of a seven photo set showing a northbound bridge
crossing. We are nearing the north end of the truss structure in the photo
above, and have exited the truss in the photo below as we continue down
the approach spans towards Delaware City.
|
